An open-plan living space needs clearly defined zones or it can lack character. Follow our steps to give yours its own personality.
Once you’ve decided on an open-plan scheme and mapped out a space that incorporates cooking, living and dining, what’s the next step? It’s easy to jump right into choosing furniture and fittings without giving some serious thought to how the new space will feel and function.
However, as Graeme Smith of Second Nature and 1909 Kitchens points out, the room could lose character as a result. “There is a risk when knocking down walls to make a space larger that you lose cosiness and intimacy,” he explains. “The room can become cavernous and lack personality.
The solution is to create a series of smaller zones – each dedicated to a different task – that work independently but blend together.
Base your open plan layout on your practical needs. “If you are going to reimagine the ground floor of your house, make decisions based on what you and your family use the space for and where it’s best to locate the kitchen, eating spaces, lounging spaces and so on,” advises Terry Brown of Benchmarx.
To help you on your way, follow these eight fail-safe steps to successful open-plan living.
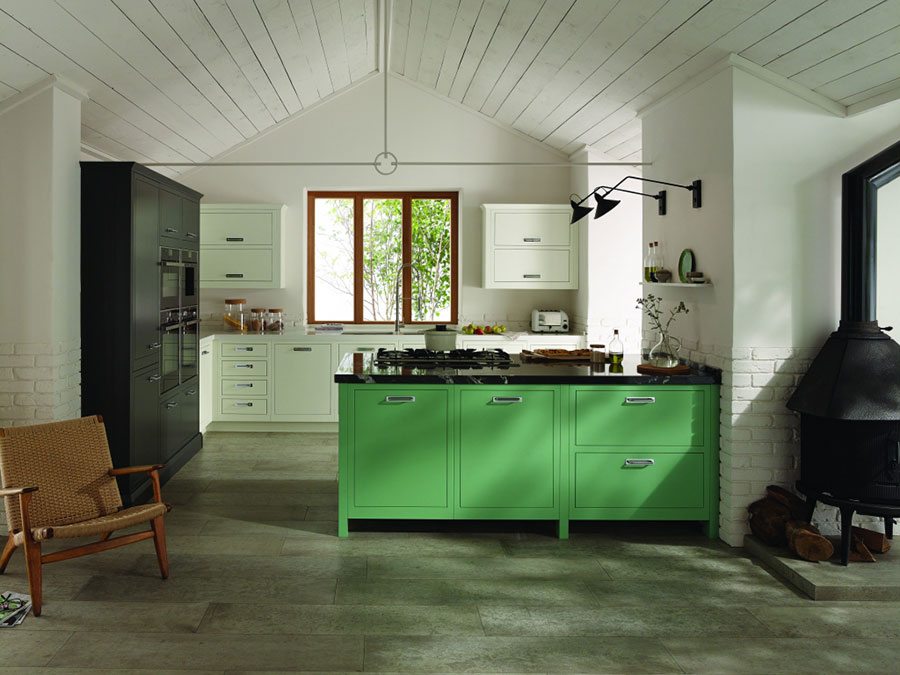
With simple detailing, the slab door featured on this kitchen by 1909 Kitchens offers a refined and contemporary look. It’s priced from £20,000.
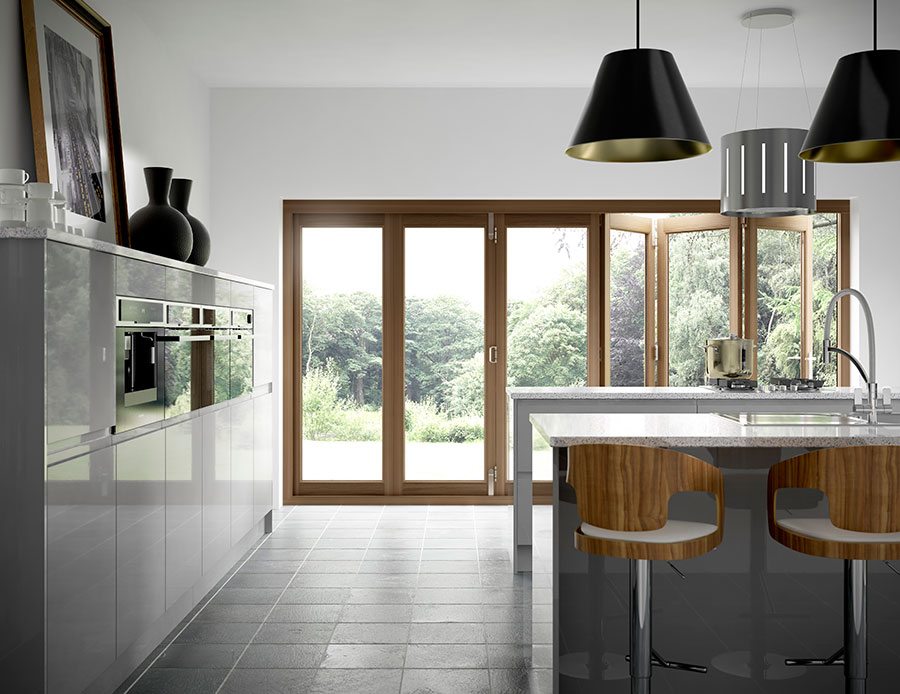
1. Incorporate a kitchen island
There are many ways to define zones within an open-plan space, but an island is always a popular one, provided your room is big enough. Use the island to create extra storage and create a mid-height physical division between zones without compromising light.
Think about how you’ll use the island before deciding on a design. Will it be for dining, storage, food preparation or to house sinks and appliances? Read expert advice on planning the perfect kitchen island before making any decisions.
If you don’t have the space for an island, consider a peninsula. With one end fixed to a wall, it’ll take up less valuable floor space.
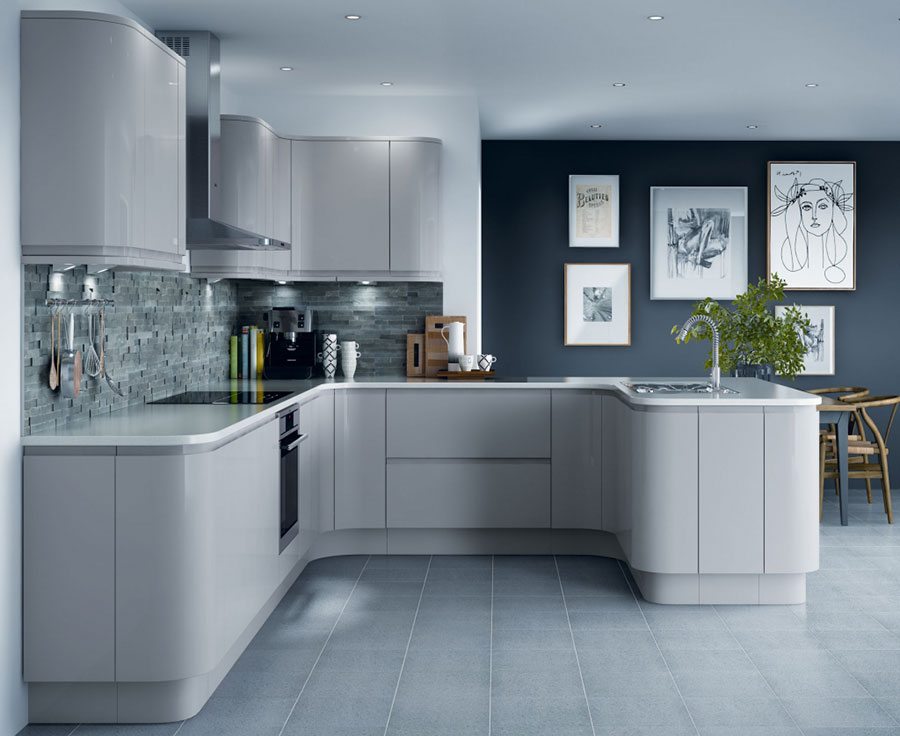
Curved units with a lacquered finish define the Holborn Gloss Cashmere kitchen by Benchmarx. Prices for a standard 100cm base unit start from around £100.
2. Focus on flooring
Visually separate the kitchen from dining and living spaces by using different flooring materials. For example, pick a tiled floor for the kitchen zone to contrast with wooden flooring or carpet for the dining and living areas.
Alternatively, go for a more subtle transition: “Blend one area into another by using different tones of the same material, such as laminate or vinyl,” suggests Terry.
If you have the same floor throughout, an easy way to create a zone is with strategically placed rugs. Two different coloured and/or patterned rugs – one for beneath the dining table and the other in front of the fireplace or sofa – will reinforce the sense that you’re occupying three different room areas that happen not to be separated by walls.
A wood floor gives way to tiles in this bespoke kitchen designed by Roundhouse, priced from £40,000.
3. Look up and down
You can also create zones by raising or lowering the floor, advises Vivienne Warman of Kitchen Coordination, specialists in Rational Kitchens: “The step up/down will become the transition between your kitchen and living space.”
Another useful method is to vary ceiling surfaces. Often a tongue and groove kitchen ceiling contrasts nicely with a smoothly plastered living area ceiling.
A small step separates the kitchen from the living and dining room in this open-plan space. The kitchen by Roundhouse starts at £40,000.
-
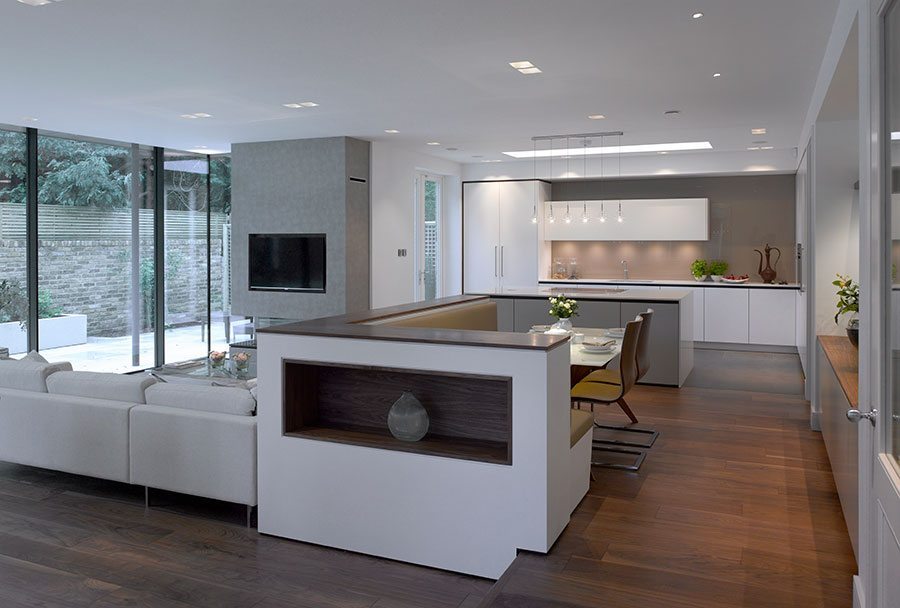
4. Get into the flow
Screens and room dividers help to zone a multi-functional living space while retaining a sense of flow. “They have the additional benefit of being mobile, so should you change your mind or want to alter a layout you aren’t restricted,” explains Vivienne.
Use your existing furniture to divide your room: for example, angle a sofa with its back to your dining area to separate the spaces. “An open shelving unit is another simple addition. Being open backed, it ensures that the space won’t feel too closed in,” continues Vivienne. “Alternatively you could suspend a curtain from the ceiling. Choose a sheer fabric to ensure you keep the sense of open plan.”
A row of mid-height units brings a new dimension to the Sofia Pewter kitchen by Wickes, around £1,700. Price based on an eight-unit example.
5. Look for colour connections
Use colour cleverly to link the zones in your open-plan room. “If you choose one base colour throughout a scheme, this will unify the space. You can then choose contrasting colours to define the zones for different uses,” advises Vivienne.
If you’re not confident mixing and matching colours, adding items in a similar colour throughout a neutral, open-plan space will create a uniformed look. “Mix up the textures to keep things interesting,” says Cyril Raberin of Mobalpa.
Alternatively, use materials to create connections. Jamie Telford of Roundhouse suggests a dining table or chairs in the same wood as an island breakfast bar or box shelving.
This David Linley kitchen features a combination of painted and American walnut units in an open-plan design by Hoban Design. Prices available on request.
-
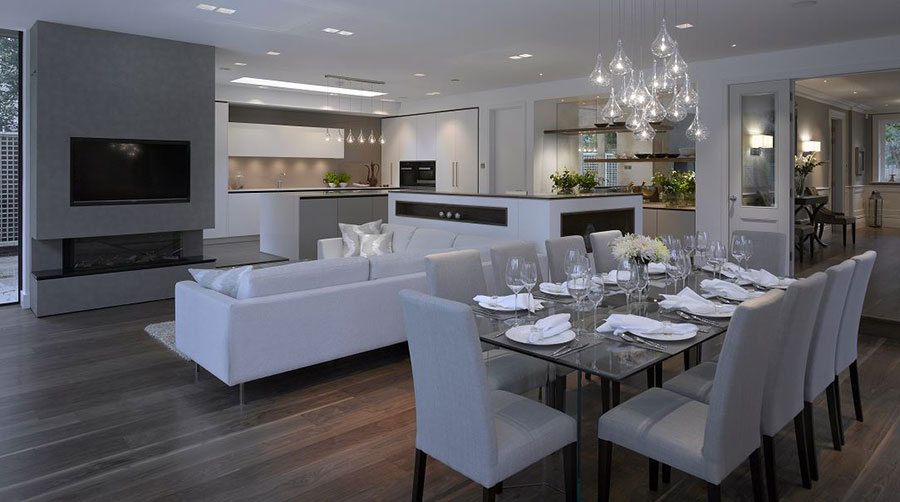
6. Pick a pendant light
Pretty pendant lights hung over an island are the perfect segue between the kitchen and the living area – especially if they echo a particular material or colour.
Scatter cushions echo the pink polished plaster splashback in the Ladbroke kitchen by Cue & Co of London. Expect to pay from £35,000 for similar.
-
7. Design continuity
Create continuity by extending kitchen cabinets into your living area. “Consider matt finishes or wood-effect cabinetry for a contemporary and streamlined look,” says Cyril.
Many furniture ranges now include pieces for other areas of the room, such as TV or display cabinets, helping to blur the boundaries between the spaces. “These can be used as storage space for aesthetically pleasing items such as cookery books, china sets or any technology pieces such as a radio or speakers,” continues Cyril.
Mobalpa’s made-to-measure Luna Patchwork is available in 12 colours and priced from £8,000 excluding appliances and worktop.
8. Go low profile
The danger of zoning is that the defined areas don’t work together as a whole. To prevent this, use these tricks of the design trade to integrate your kitchen into the rest of the living space.
Install retractable elements such as downdraft extractors that sit flush to the worktop or the hob itself when not in use help to make the kitchen look less utilitarian. Retractable taps and pop-up plug sockets have a similar effect. Go one step further and use pocket, sliding or bi-fold doors to conceal appliances and sinks quickly.
Alternatively, shop for appliances that blend into the space. For example, the latest handless ovens featuring super-sleek touchscreens are designed to be unobtrusive, while undercounter sinks sit below the worktop so as not to disrupt its clean lines.
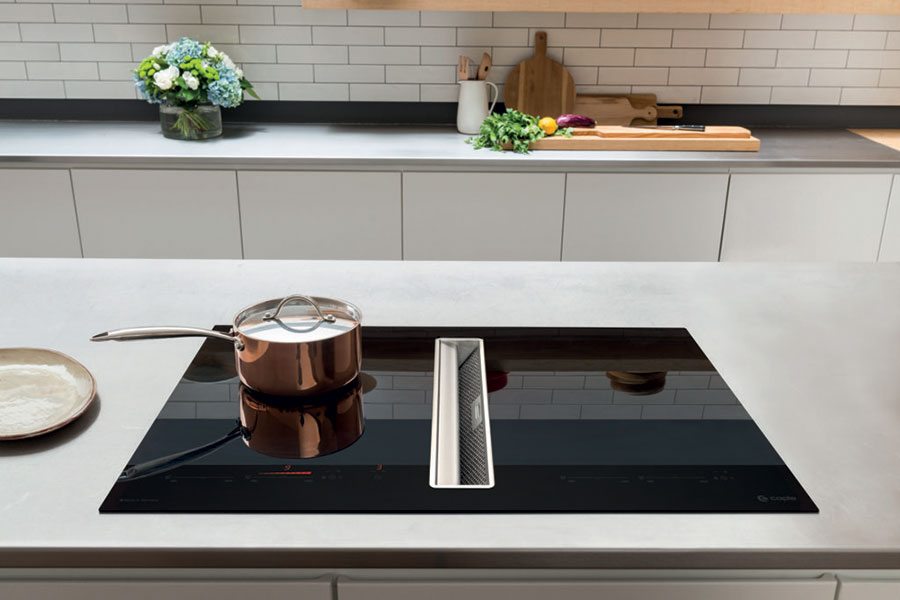
The DD940BK induction downdraft extractor by Caple measures 900mmW by 580mmD by 55mmH, allowing for a large cooking area. It’s rated A+ for energy efficiency and priced from £3,414
9. Be happy
If you’re investing money in reconfiguring your existing layout, invest time too, and create an area that you’ll love and be happy in. It’s worth spending as much time as it takes at the concept stage to plan exactly where you want everything to be, so that when it’s completed you’ll be able to use and relax in precisely the space you’ve always dreamed of.
The Pura collection by Rational is featured in this open-plan space designed by Kitchen Coordination. A Rational kitchen of this size would cost around £20,000.
SaveSaveSaveSave
SaveSave